Hiya again
Now we're showing how to configure up ICS to deal with the connectivity to EBS.
Construct the JDBC URL
- From the EBS connection information, construct the JDBC URL to insert into the integrations.The URL should look something like
jdbc:oracle:thin:rws60039rems.oracle.com:1541:ebs11ic2
Obtain the PAR File
- From the solution distribution, get the
selfservice-backend/ICS/EBS_SelfService.parfile.
Upload the ICS Integrations Package
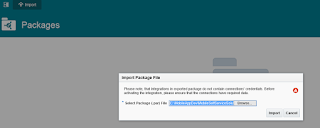
Go to ICS homepage and select Designer > Packages > Import Package. Select the PAR file in the file browser and click OK and Import.

This will create nine integrations:
EBS_DeleteTimecardEBS_GetEmployeeProfileEBS_GetTimecardCategoriesEBS_GetTimecardsEBS_CreateTimecardEBS_DoTimecardApprovalEBS_GetTimecardApprovalListEBS_GetTimecardDetailsEBS_GetVacations
ICS Local REST11iEbizDBEBS_SelfServiceSOAP
Correct the ICS Local REST Connection
- Go to Connections and click to open ICS LOCAL REST.
- Click Configure Connectivity and set the URL based on what is shown in your browser's address bar.For example, if you see
https://icsapps-icaspps.integration.dc1.c9dev2.oraclecorp.com/ics/faces/global, the Connection URL should behttps://icsapps-icaspps.integration.dc1.c9dev2.oraclecorp.com.
The username and password should be set to an ICS system user credentials.
Not providing much info here as it is very install specific.
- Click Test and then Exit Connection and Save. Click Yes to confirm that the integrations you just imported will be affected.

- If you see the following message, repeat the above steps and test again.
We cannot save your connection. [Cause: ICS-10954]:- Unable to marshall the AppInstance into an xmlString.
( this error was not seen )
Correct the SOAP Connection
( These steps seem not to be needed !!!! ) start going again at the Database Connectionsd.
- Go to connections and click to open EBS_SelfServiceSOAP.
- You may need to upload the WSDL again. This WSDL should be in your project zip file (
ebsselfservice-backend/ICS/EBS_SelfServiceActions.wsdl). - The username and password should be set to an ICS system user credentials.
- Click Test and then Exit Connection and Save. Click Yes to confirm that 3 of the integrations you just imported will be affected.
Correct the Database Connection Information
- Edit the DB Connection and configure the hostname, port, SID or service name, and the username and password.
- Choose the agent group which you earlier created and validated and click Test to get it to 100% configured.
Saving this pops up the same warning box that you are affecting all the integrations; this is fine because you need to connect to EBS ! Click OK.
Activate All Integrations
Go through all the integrations and drag across the start button
Do all the rest and it should look like :
That's all for now. In our next blog entry we'll move on to testing the integrations and finally moving towards MCS


No comments:
Post a Comment